
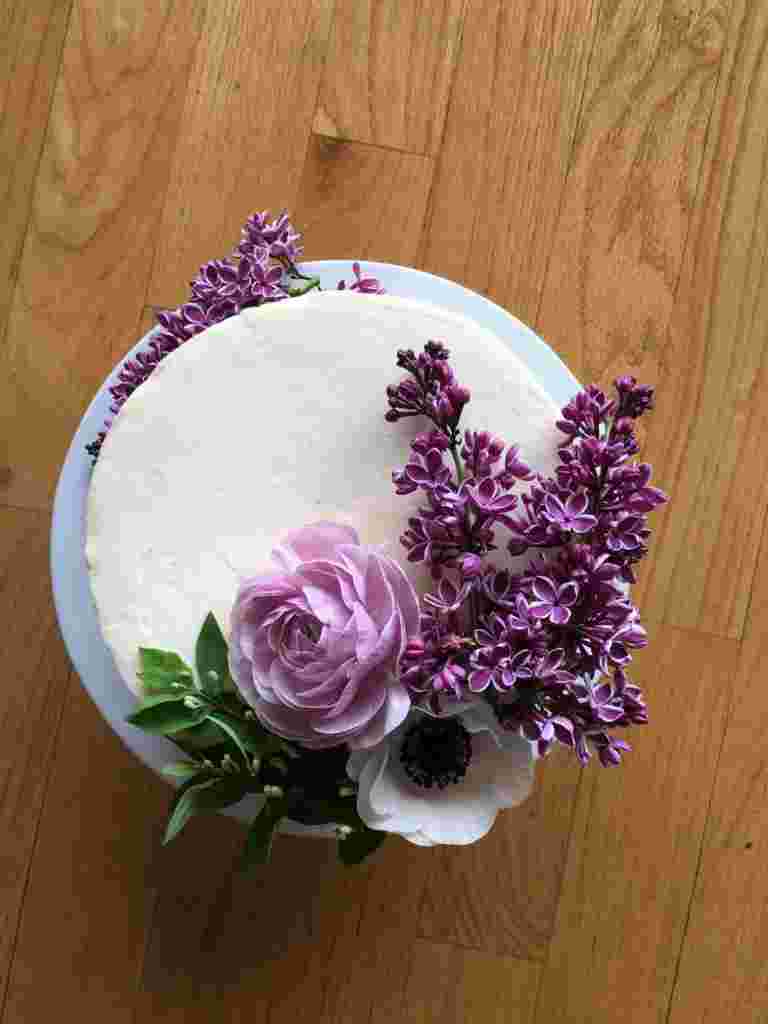
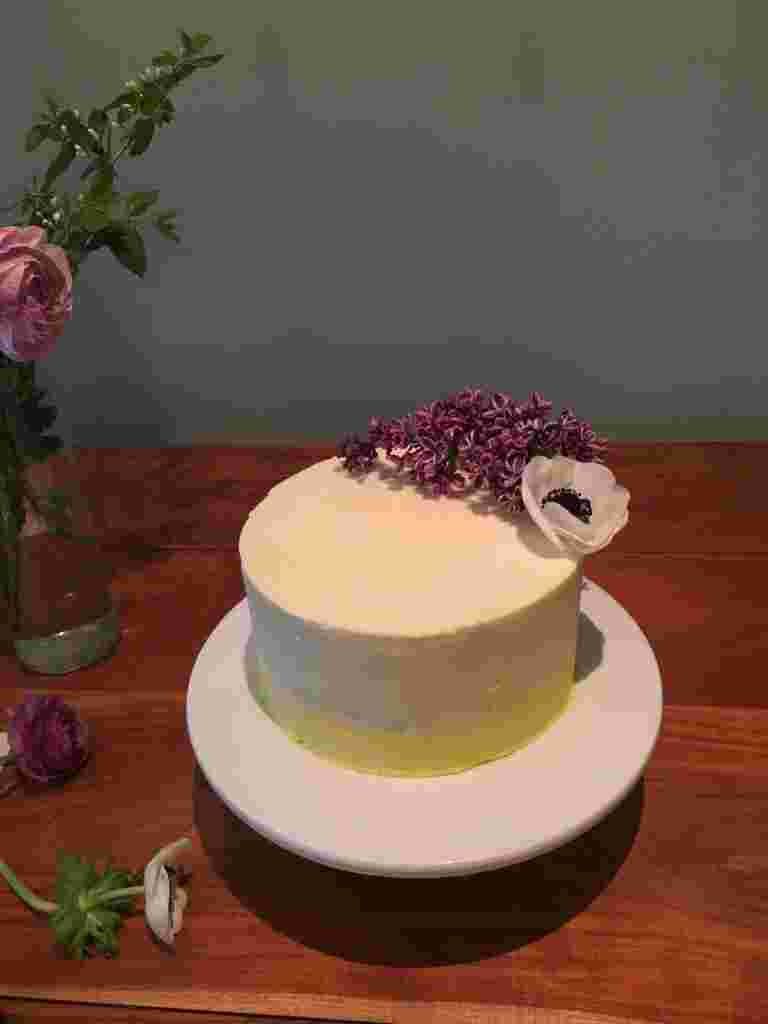
My lemon elderflower layer cake is my new baby. You know, life is a journey. And at this point, this cake is definitely the pinnacle of my cake making skills (trust me – that lemon curd is sooooo good). Anyway, I’m also excited about it because I branched out and decorated it with fresh flowers! And, honestly, it’s no mystery why wedding cakes these days are just bursting with fresh flowers – they cover, disguise, and distract from any blemishes, imperfections, or frosting smudges on your cake. Unsure of your frosting skills? Literally pluck a fresh flower on your cake, and it will be elevated from homemade confection to professional beauty.
However, when I was researching the logistics of how to actually put flowers on and in cakes, I couldn’t find that much information online about it. So this is what I did, and hopefully it can be helpful to you!
Before I start, I must warn that using fresh flowers does come with a certain degree of risk management. Flowers, after all, aren’t really meant to be put on food, and so there’s a spectrum of things you can do to manage that risk, which I’ll try to explain. I found a lot of articles online (mostly from bakers) who were horrified at the prospect of putting fresh flowers – any flowers – on baked goods. I’m no horticultural expert, so do the research you need, and think about what you’re comfortable with.
Choosing the Flowers
First, I think it’s important to find organic or pesticide-free flowers. I have no idea what pesticides are used on flowers, and whether you can adequately remove them just by rinsing flowers under clean water. You’re not eating the flowers, but it’s better to be safe than sorry, and especially if you’re putting them on sticky surfaces like buttercream, there’s a good chance that chemicals can transfer to the food. Find a good florist, talk to them about your plans, and see what they say about the treatment, transport, and storage of their flowers. Also ask them how long different flowers will keep and what temperatures they can tolerate without water. Some flowers are more delicate and will wilt very rapidly out of water – try to steer clear of those as much as possible, life will be less stressful!
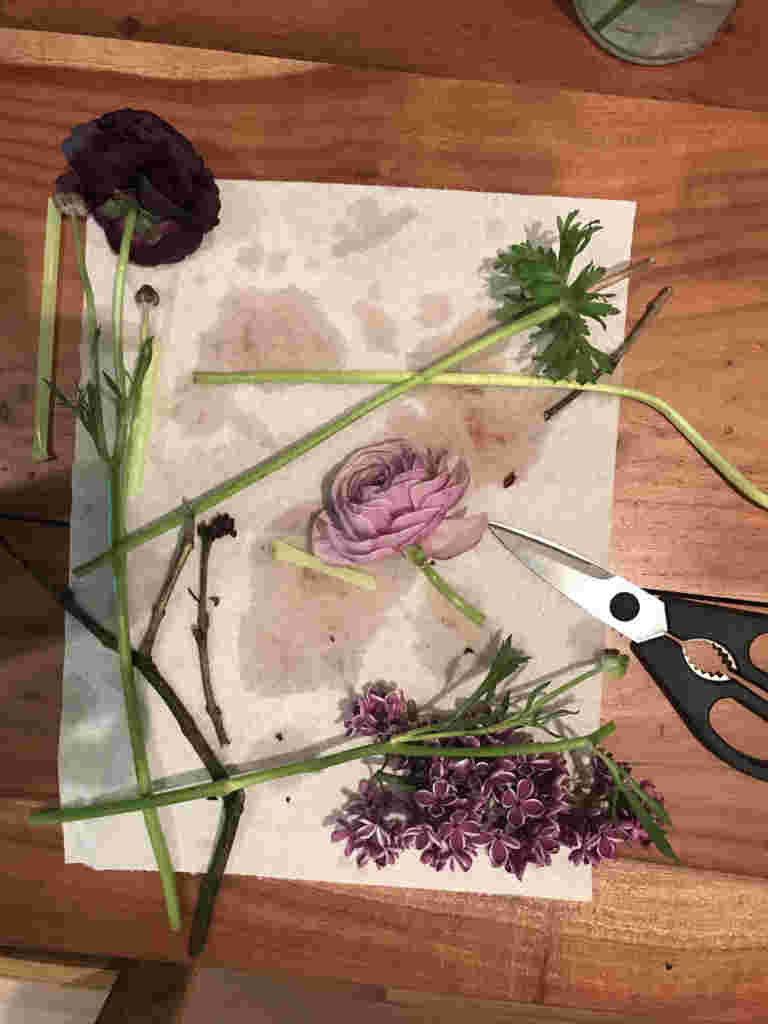
As for which flowers or greens you should actually choose, that’s another risk management decision. There are some websites that counsel you to only use technically edible flowers. While you’re not eating the flowers, parts of the plant (petals, pollen, filaments, etc.) could still fall onto or touch the cake. Since non-edible flowers contain various toxins, this could be bad. I… sort of tried to do this, but ultimately failed. The local florist which I used (and loved) here in Chicago had a limited selection of non-treated flowers, which really only consisted of absolutely beautiful ranunculus. Unfortunately, ranunculus contain toxins that can irritate the skin and mouth. I tried to find out more information online: which part of the ranunculus was actually poisonous, whether the toxin was in all parts of the flower or only in some parts, how much you’d have to eat to be affected (just a small dusting of pollen? One petal? The whole flower?), how much physical contact would be necessary to release toxins, etc… However, I couldn’t find anything really useful. Turns out, not many people are considering eating ranunculus??
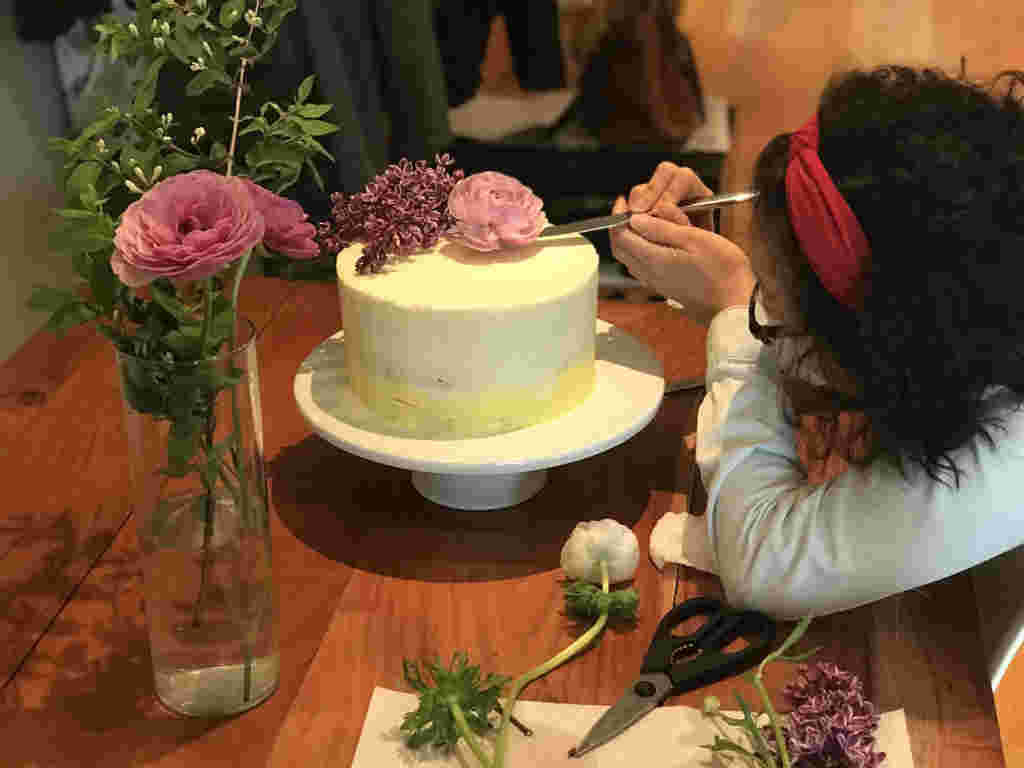
In the end, I decided to just do it – I decided that a light brushing of the underside of the ranunculus against the buttercream would not be a big deal, and if it looked like the flower was really sticking to the buttercream, I could always scrape some buttercream off the affected area. And as of the time of writing, it’s been 5 days since I’ve served the cake, and no one has complained of mouth irritation, so I feel good about this decision. Fortunately, however, there are lots of popular and beautiful flowers on the edibles list, like lilac and roses, so you should be able to find something. You could also try a food seal for more protection (see “Additional Notes” below).
Preparation
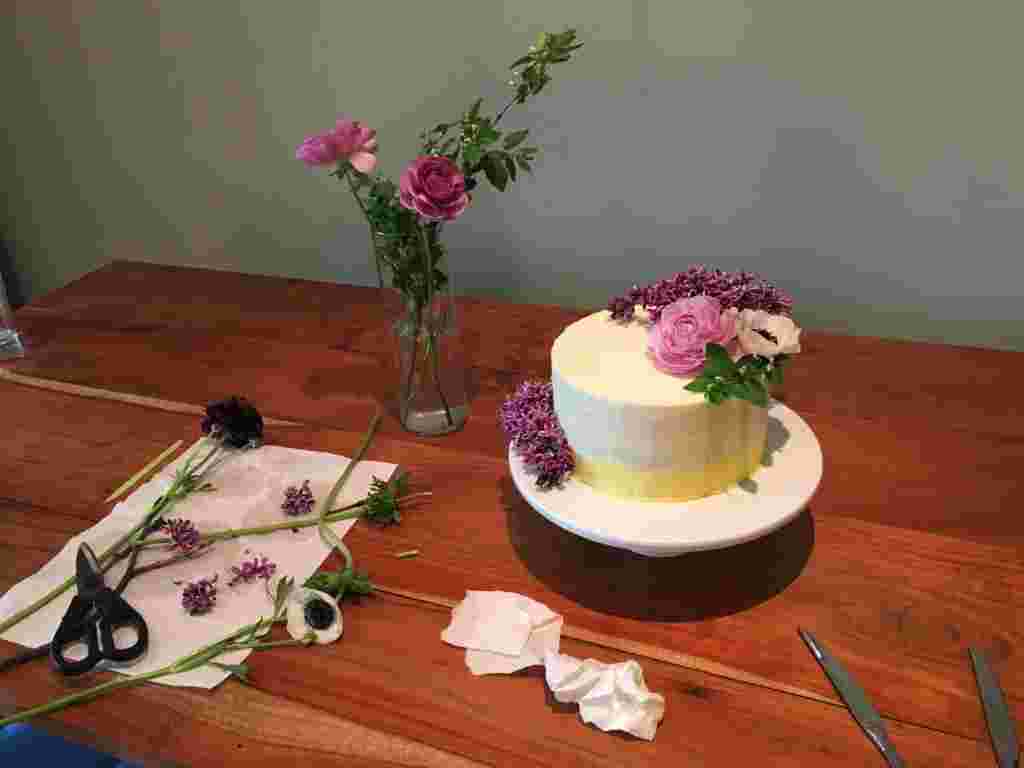
Rinse the flowers and greens you’re using under gentle cold water, brushing off any stray dirt or pollen, and running the water through the petals. This will ensure that your flowers are clean and free from bugs. Pat flowers dry with paper towels, and put stems back into water. Keep your flowers in water until you’re ready to decorate. If you use the straw water tubes as I describe below (in the “Decorating the Cake” section), I found that the flowers could probably last the day at room temperature, depending on the size of the straw and the kind of flower. If, however, you’re not providing any water source at all for your flowers, they will wilt rather quickly, especially in hot temperatures. So try to make these flowers or greens more of an accent rather than the main focus, and put them on as late as possible.
Decorating the Cake!
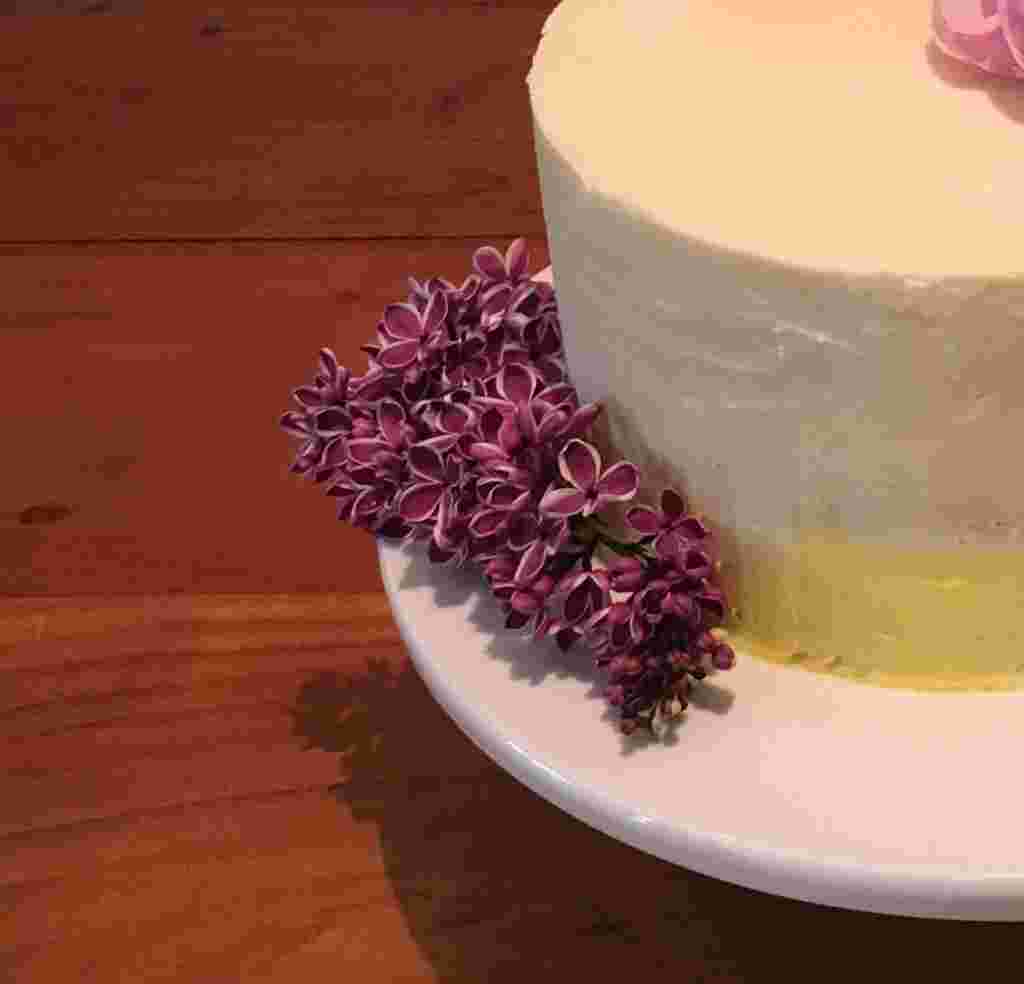
There are a few ways you can decorate with fresh flowers or greens. You could simply lay them on the top or the sides of the cake. This is what I did with the two lilac bunches – one is just resting on the top, and one is resting on the cake stand. I trimmed off the flowers on one side of the bunch resting on the cake stand so that it would lay closer to the cake and “hug” the sides more. Before I did this, the lilac was sort of in a triangle shape, poking off to the side. After, it was half of a triangle, and looked much more integrated into the cake.
For single flowers, you could also try the resting method; however, they’re more likely to topple off or tilt at a weird angle. I prefer to actually stick these into the cake. To do this, I used plastic drinking straws to create little water tubes that: a) become a tool by which to push flowers into the cake, b) provide a physical barrier so that flower fluid from the stem doesn’t leech into the cake and c) if you’re sticking the flowers in to the cake vertically, provide a small reservoir of water for your flowers.
I used regular 1/4-inch diameter drinking straws, because those were the only ones I could find. They were big enough for my flower stems, but just barely. If you can find larger straws (I think the straws provided at McDonald’s or Starbucks might be a tiny bit larger in diameter?), or the straws used for boba, they might work better. Just make sure that the stems of your flowers or greens fit comfortably into the straw.
To make the water tubes, first cut off any bending bits so that your straw is just a straight tube. Next, you’re going to use heat to melt and seal one end of the straw. Over a flat, heatproof surface (I used the bottom of a baking tray), light a match or lighter and hold it to one edge of the straw until the straw starts to melt and shrink. This will only take a second! Quickly blow out the match and then, using another flat, heavy, heatproof object (I used the flat bottom of an oven-proof ceramic bowl), quickly press down hard on the melted plastic and hold for a few seconds until the plastic cools. After the plastic has cooled, you should have effectively sealed the straw at that end. To test, fill the straw with water (due to the tiny volume inside the straw, trickle the water into the straw in as fine a stream as you can to avoid trapping air bubbles and preventing the water from flowing all the way to the bottom of the tube. It also helps to hold the straw at an angle to the trickle of water). After you’ve got water in the bottom of the straw, rub the sealed bit with your dry fingers and thumb. If it’s truly sealed, no water should leak out and you should feel no water between your fingers.
A note about melting plastic: James, who admittedly is not a materials and food scientist by any stretch, seems to think that no harm will come of inserting heated, melted, then cooled plastic into food products. This answer was acceptable to me, as it’s not like I’m melting plastic and dripping it over food. The straw is completely cool by the time it touches the cake. If there are any plastics experts out there who disagree, please do let me know! And if you don’t feel comfortable with melting plastic, maybe there are tiny little glass test tubes you can buy for this purpose? I didn’t research this too closely, but if you have some alternative suggestions, I’d love to know those too.
Use the straw tubes to put flowers into cake:
Trim the unsealed end of the straw tube so that the tube is about 2 – 3 inches long. Trim the flower so that the stem is about the same length as the straw tube. You don’t want the stem to be too long; otherwise, your flower will look like it’s floating above the cake. You don’t want it too short either, though, because then it won’t reach any of the water at the bottom of the tube. Don’t worry too much if the stem is too long for now – you can always trim it after you’ve inserted the straw. Fill the tube with a little water (if using), and place the stem of the flower inside the tube. After placing the flower in, the water level should be about 1/4 inch below the top of the tube – adjust the water amount if necessary.
Push the straw tube gently but firmly into the cake where you want the flower to go. Continue to push the straw tube down into the cake, adjusting the angle if necessary to land your flower where you want. If you feel comfortable in the angle, you can always remove the flower from the tube, and just use the tip of your finger to push the tube down. If you want to keep the flower in the straw tube as you’re pushing down, I find it helpful to push down on the straw edge with a flat, thin object like a butter knife, holding the knife parallel to the surface of the cake, to avoid accidentally touching the frosting. You’ll want the lip of the straw tube to be about flush with the surface of the cake, maybe a tiny bit above, so you can easily remove the straws later. Check how your flower looks. If it’s “hovering” too much above the cake, take it out from the straw and snip a bit off the end of the stem.
Note that if you’re inserting the flowers horizontally, or at a horizontal-ish angle, you won’t really be able to put much water, if any, in the tube. That’s okay, but it’s something you’ll have to keep in mind – maybe keep the flowers in water for as long as you can, and just insert them into the tubes right before you present the cake. Also, try to angle the opening of the straw tubes at least a little bit upward, so that any sap or flower juice from the stem will collect at the bottom of the tube instead of spilling over onto your cake.
As a bonus, because the flowers go into the straws and not into the cake itself, you can always switch the flowers into different straws if you’re not happy with your original arrangement.
Additional Notes:
If you want to provide more of a barrier between the flower and the cake, I did find this special food seal that coats items with a food safe material. I did not use this, so I don’t know how well it would work, or what appearance it would give your sealed flowers / plants. My feeling is that you would only be able to coat the stem and the underside of the flowers. The seal might be a good way to create a physical barrier between the underside of the flower and the cake, if you’re using non-edible flowers and concerned about toxins passing to the cake from contact. If you use it, let me know what you think!
I feel like I should add a legal disclaimer at the end. If you use ranunculus and end up with sore mouth, please don’t sue me. I’m not responsible.